Cat Laser
A auto cat laser turrent that moves around the room for a cat, which is controlled by a analog joystick.
This was my first project to introduce myself to electrical engineering, and after these three weeks I learned how to solder and use the arduino. This project was enjoyable for me (and my cat) and made me want to further explore engineering.
2nd session project
| Engineer | School | Area of Interest | Grade |
|---|---|---|---|
| Michael | Lynbrook HS | Electrical Engineering | Incoming Junior |

Demo Video:
Code for the Project:
Final Milestone
my final milestone was soldering the wires to a perfboard. The arduino only has two ground ports, and my project needed four, so I connected three of the wires to one rail of the perfboard. I did the same with the 5v port and used the second ground port for the laser. Finally, I switched the button with a analog joystick. The joystick is used to control the servos and it even has a built-in button, which allows me to turn on and off the laser.
Second Milestone
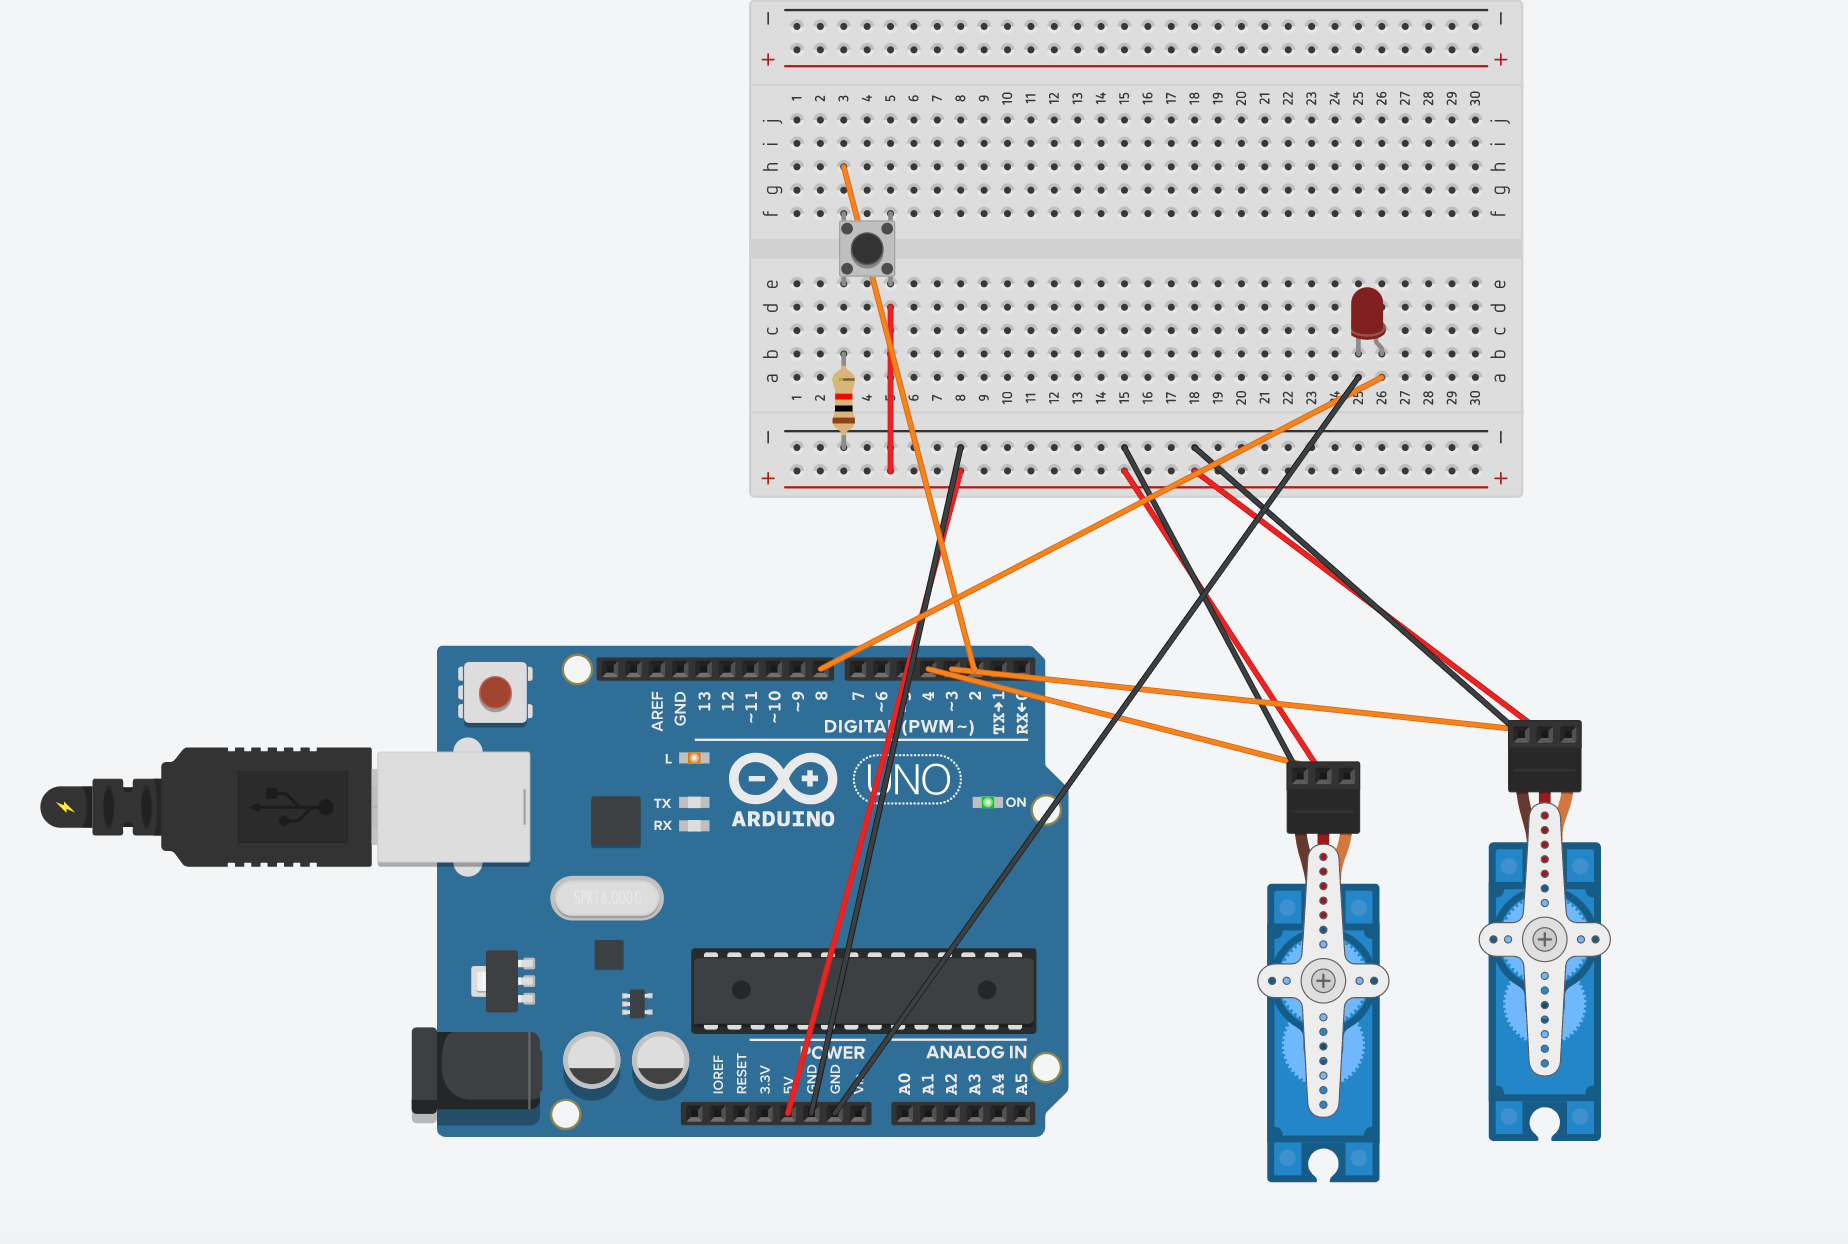
my second milestone was finishing a working cat laser turrent. One servo is connected to the arm of the second, and the laser is mounted on the arm of the top servo. When the button is pressed, two servos move in random directions and the laser turns on. The bottom servo allows the laser to move left and right while the top servo moves it up and down.
picture of the circuit: (pretend the led is a laser)
First Milestone
My first milestone was downloading the Auduino IDE and setting up my aurdino to my computer. I then connected a servo to the aurdino and also a button using the breadboard. When the button is pressed, the servo moves from it’s default position to a random position. When the button is released it goes back to the default position. I also managed to turn on and off the laser diode and also add additional buttons and servos to my circuit on the breadboard.